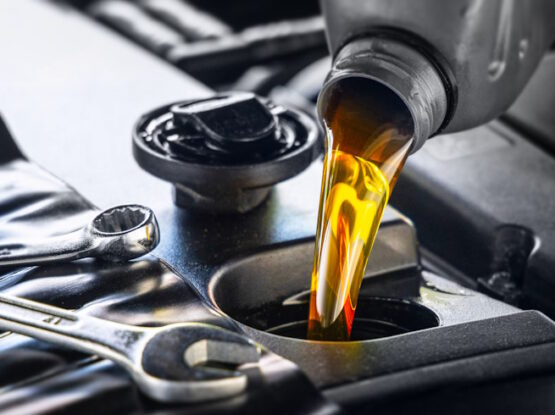
Checking your oil level is one of the simplest — yet most important — ways to keep your vehicle running smoothly. Knowing how to read your oil dipstick can help you catch low oil levels early and avoid serious engine damage. If you’ve ever wondered where to find your dipstick or how much oil should be on the dipstick, this guide from Paul’s Auto Repair will walk you through every step.
Where To Find Your Dipstick
Pop the hood and look for a small handle or loop — usually bright yellow, orange, or red — located near the engine. That’s your oil dipstick. It’s designed to stand out for easy access. In most vehicles, the dipstick is located on the side of the engine closest to the front of the car, but the exact location can vary depending on whether your vehicle has a front-wheel drive or rear-wheel drive engine layout.
If you’re having trouble locating it, check your owner’s manual for a diagram. Some newer vehicles (especially certain European models and hybrids) may not have a traditional dipstick at all, instead relying on an electronic oil level sensor.
How To Read Oil Level On a Dipstick
Once you’ve located the dipstick, follow these simple steps to get an accurate oil reading:
- Make sure your car is parked on level ground and the engine is off (ideally cooled for a few minutes).
- Pull the dipstick out and wipe it clean with a lint-free rag or paper towel.
- Reinsert the dipstick fully back into its tube, then pull it out again to check the oil level.
Now you’re ready to read your oil dipstick — and this is where most people get confused. Let’s break down what you’ll see.
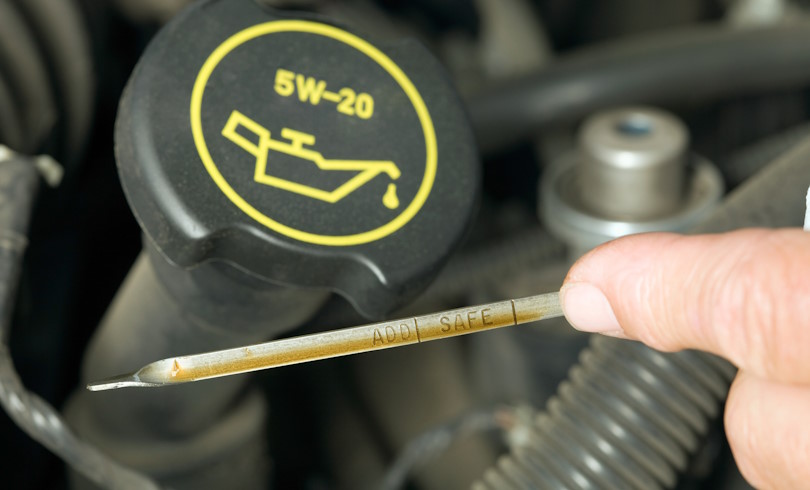
Understanding the Oil Level Markings
Different vehicles use different styles of markings, but they all serve the same purpose — to show you whether your oil level is within the safe range. Here’s what to look for:
- Two Holes or Dots: The lower hole indicates “Low,” and the upper hole indicates “Full.” The oil should be somewhere between these two marks.
- Crosshatch or Shaded Area: The crosshatched section represents the safe operating range. Oil that covers halfway to three-quarters of this section is ideal.
- Lines or Notches: You might see “L” and “H” (Low and High) or “MIN” and “MAX.” Again, your oil should fall between these marks.
When wondering how much oil should be on the dipstick, the short answer is: enough to sit between the lower and upper marks — ideally closer to the top mark but never above it. Too little oil can cause engine wear; too much oil can lead to foaming or pressure issues.
What the Oil Color and Consistency Tell You
While you’re checking the level, take a moment to inspect the oil itself. Clean oil usually appears light amber and somewhat translucent. Dark, dirty, or gritty oil may indicate it’s time for an oil change. If the oil looks milky, it could be a sign of coolant mixing with oil — which means you should bring your car to a professional mechanic right away.
How Often Should You Check Your Oil?
As a rule of thumb, check your oil every few weeks or at least once a month — especially before long trips. Regular checks help ensure your engine always has the proper amount of oil and can alert you early to leaks or other issues.
Need Help Reading Your Dipstick or Changing Your Oil?
Even if you know how to read an oil dipstick, it’s always a good idea to have professionals take a look. At Paul’s Auto Repair, our certified technicians can perform quick oil checks, oil changes, and full inspections to keep your engine healthy and efficient.
Stop by our shop or schedule your next oil change online today!